Have you ever walked through a gorgeous garden, that’s let down by cracked and shabby tiles?
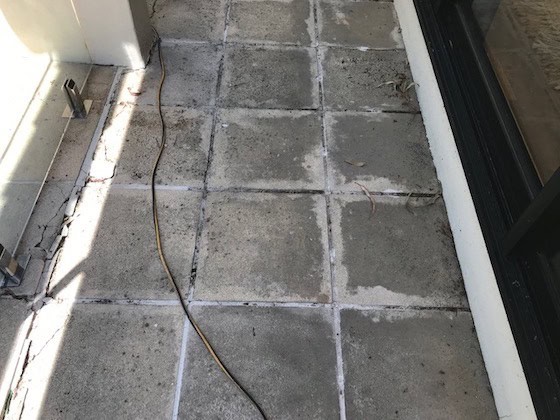
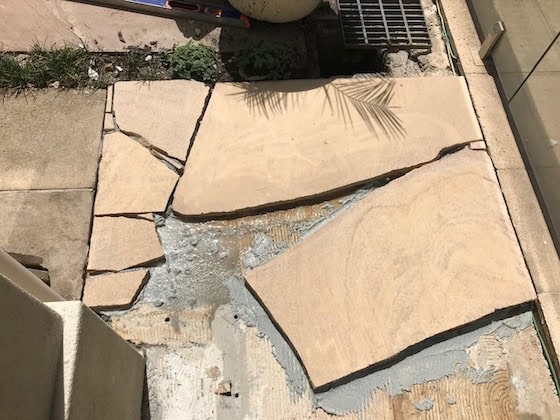
They spoil the garden’s appeal and disrupt the flow, don’t they? This was the exact problem faced by one of my favorite clients, whose poolside sandstone pavers were cracked and had shifted over time.
Rather than undertaking an extensive, and costly, renovation of the entire area, I decided on a creative and budget-friendly solution: crazy paving.
This innovative approach not only promised to cover up the imperfections but also introduced a new, artistic element to the garden area providing a harmonious connection between the pool and vegetable garden and the house.
Assessing the damage
The original sandstone pavers around the pool area were crumbling and falling apart. It was clear they needed a transformation.
Recycling & reusing:
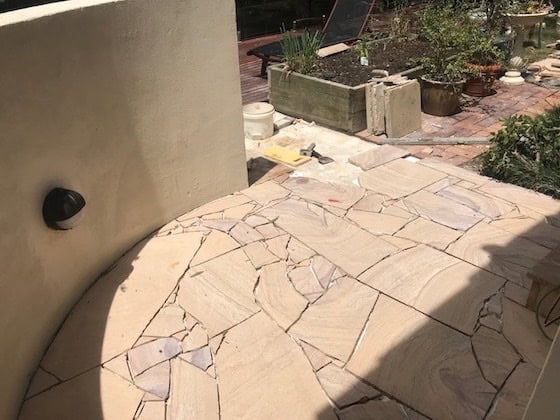
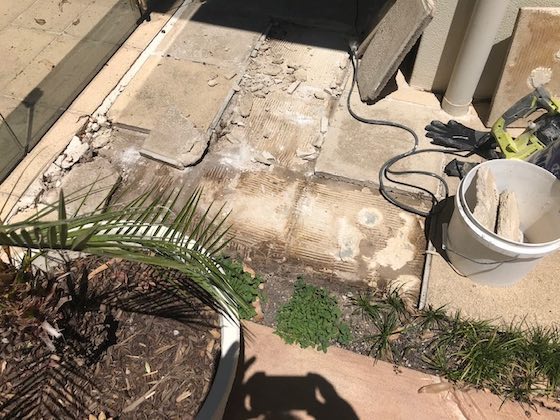
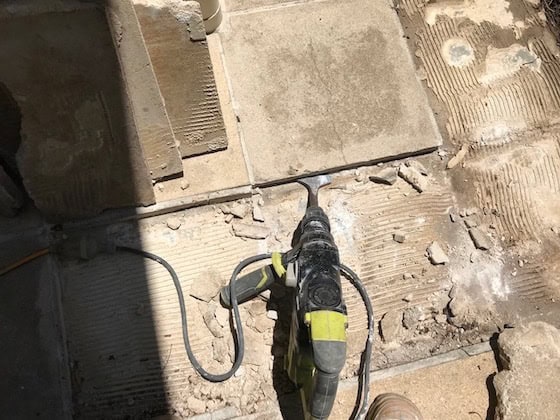
I carefully chipped up the old pavers, managing to save 12 intact pieces. These were perfect for recycling into the new crazy paving design.
Choosing the right material
I chose sandstone that matched the original color, so they would blend seamlessly with the existing pavers.
Crafting the artwork
With a dose of creativity I arranged the recycled and new pieces. Extra glue under the new paving ensured they aligned perfectly with the existing pavers.
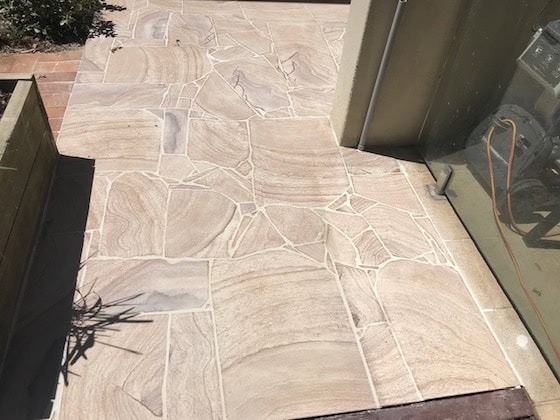
The stunning result
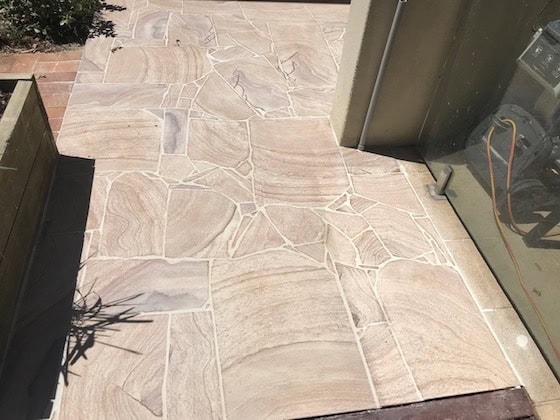
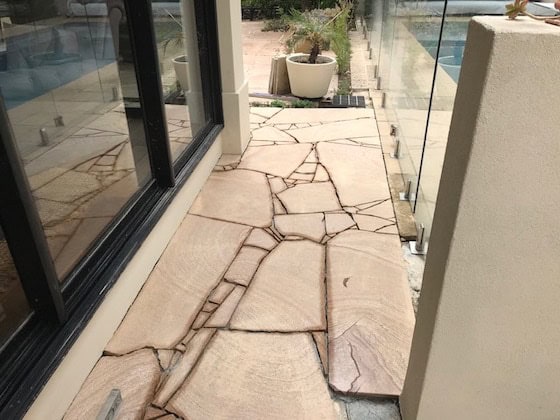
A pathway that solved the structural issues and elevated the entire garden’s aesthetics. The clients were delighted, describing the transformation as a “piece of art.”
Why not give crazy paving a try for your next garden project? It’s an innovative way to turn imperfections into an artistic statement. Don’t just fix, transform!
Now, let’s dive into how you can achieve this amazing transformation yourself with a step-by-step guide to laying crazy pave.
Table of Contents
What is Crazy Paving?
Crazy pave uses recycled sandstone that’s normally thrown away to add exceptional character to any pathway. Think mosaic tiling- that’s crazy pave! The streets of Ipanema, Rotterdam or Melbourne. The eclectic jagged paving. It’s iconic and its epic.
What is Crazy Pave made from?
Crazy paving is made from flat sandstone sheets, 30mm thick, of varying shapes and sizes. Each piece is a unique size off-cut from the factory where sandstone tiles are cut. There’s nothing wrong with the pieces and the nature of irregular sandstone allows you to create a unique feature for your property.
- These are not actually pavers so they have to be glued down to a solid flat base.
We recommend products based on our experience and use of the products. If you use our links to make a purchase, we may earn a commission which is no additional cost to you. Read our disclosures
Tools & Materials
- Sandstone
- Tile glue - interior/exterior premium
- 4 x 20 litre plastic buckets
- 2 x sponges
- Strong drill to mix glue
- Glue mixing bit
- Trowel
- 20mm notch tiling trowel
- Rubber mallet
- Wet saw for cutting sandstone
- Broom
- Angle grinder with masonry blade
- Rubber grouting tool
- Dust potection mask
- Ear protection

Prep for laying crazy pave
Irregular sandstone paving must be laid on a solid surface. For example concrete, or floorboards that have been nailed down.
The How To
Step 1 Prepare area
Clean the area where crazy pave is to be laid. If it’s to be laid outside it’s a good idea to use a high pressure hose to get rid of dirt and mould. If inside, sweep or vacuum area to make sure you remove all dust and dirt.
Step 2 Mix glue
The glue you use must be an interior/exterior premium rubber modified cement based tile glue.
You will need 3 x 20 litre plastic buckets for mixing
- 1 for mixing tile glue in
- 1 to use for cleaning your mixing blade
- 1 with clean water to add to the glue, if needed
Find an open area preferably outside with plenty of ventilation.
Follow the manufacturer’s instructions on the glue bag to create the mixture. Pay close attention to the recommended water/powder ratio and mixing guidelines.
Important
Always use gloves, eye protection ,ear protection and dust mask when performing these tasks.
Dust from the glue is very fine and light and floats in the air very easily. It’s dangerous and should not be inhaled.
Use a dust protection mask when adding glue to the bucket and mixing. Do not remove dust mask until mixing is completed.
Step 3 Setting out job
One of the best things about irregular paving is the creative freedom it offers. There’s no lines that have to be followed, and no specific start or finish point. It’s like a jigsaw puzzle – but you’re able to make the pieces you can’t find.
This is when tools like a wet saw or angle grinder with a diamond blade become useful.
Step 4
4a Laying the first piece of sandstone
Choose a large piece of sandstone that has one straight edge, and use this as your border.
Sometimes you might find pieces with a factory cut edge, as irregular paving utilizes leftover off-cuts from sandstone tile cutting.
4b If you can’t find a piece with a straight edge, make one.
Use a pencil and ruler and make a line along one of the edges. Use a wet saw or angle grinder to cut the sandstone along the pencil line giving you a straight edge.
Position this piece of sandstone where you want to start, using the straight edge as the border.
4c
Trace around the whole outside edge onto the concrete with a pencil. When you lift the sandstone, the pencil mark on the concrete will indicate where to apply the glue.
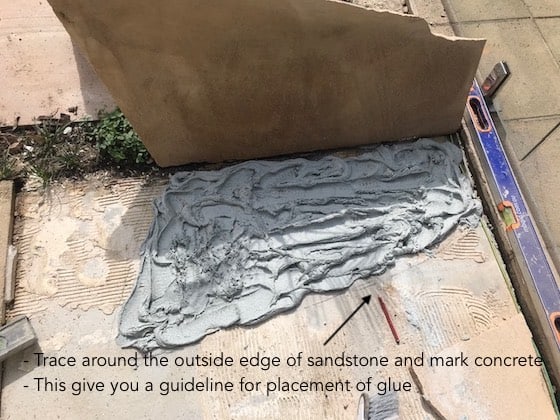
Step 5 Use a 20mm notch tiling trowel to apply glue evenly
Step 6 Sandstone and Glue
Sandstone usually has a lot of dust on it from when it was cut in the factory. Before placing the sandstone back on to the glued area, thoroughly wash the surface with a sponge and clean water to remove any dust.
If the glue has to stick to a dirty surface, it may not hold and over time the paving can become loose or sound drummy.
Keep a clean bucket of water and sponge close by to clean off any glue that makes its way onto the finished surface.
Step 7
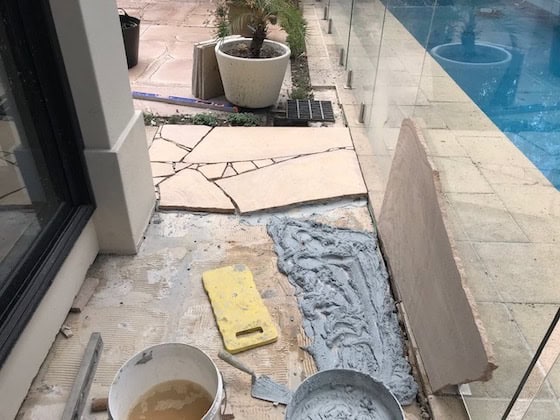
Choose another piece of crazy pave and move it around to try and match with one of the edges of the piece already laid.
It’s up to you how perfect you want it to be, but remember it is ‘crazy pave’ and it’s not supposed to be perfect.
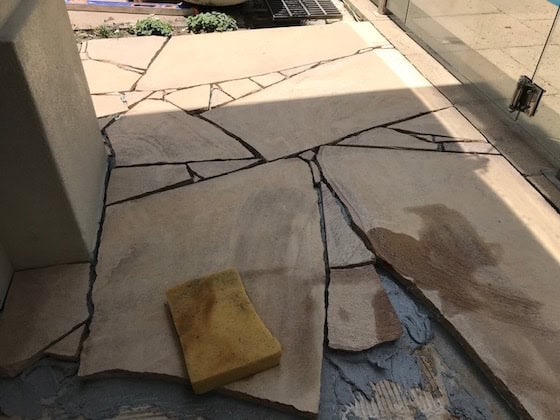
The art is to keep it simple, if it looks too perfect, it doesn't look natural
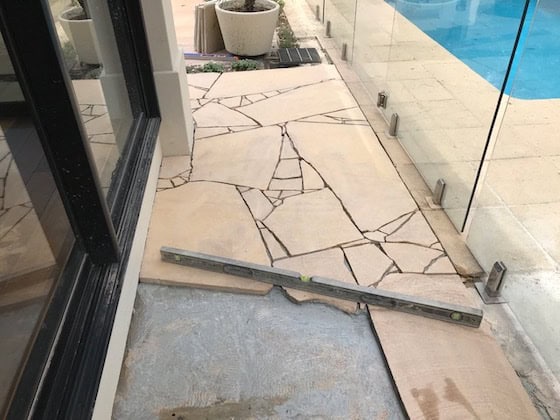
Step 8 Use a level as a straight edge
Place a level across pavers to check if they are even. Look at where the level touches the pavers; this will show any uneven areas that need adjustment.
Repeat this process each time you glue down a new piece of crazy pave.
Important
If the pathway is positioned beside the house, ensure it slopes away from the house at a gradient of at least 1:100 to ensure rainwater runs off.
Pooling water can cause the house to shift over time affecting the foundation’s stability. And also moisture attracts white ants which might find their way inside if the area remains damp.
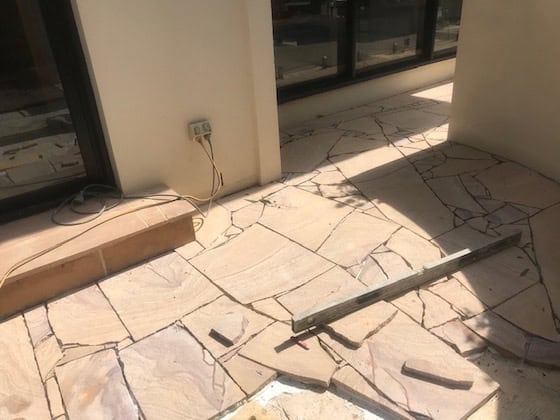
Step 9 Cutting irregular sandstone
Start filling in the gaps with broken pieces. If nothing seems to fit cut them with the wet saw or angle grinder and make them fit.
How to mark the small pieces
- Place a slightly larger piece over the area that needs to be filled.
- Use a pencil to mark where the piece needs to be cut.
- Remember it’s crazy paving, so it doesn’t have to be perfect.
Important
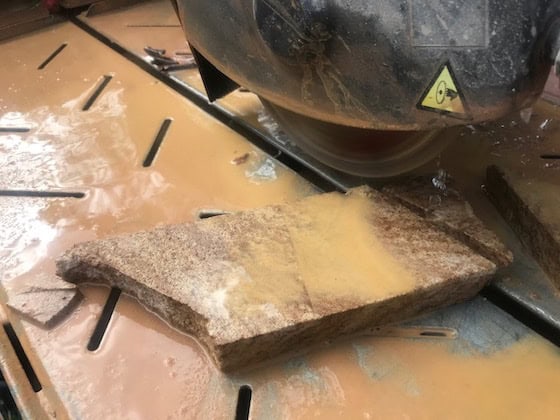
When using these tools, remember safety first, gloves, ear protection, eye protection and dust mask must be worn.The dust is very find and can be easily inhaled.
Step 10 Dry
Once you have finished laying all the paving, allow the adhesive to dry according to the recommended time on the package, usually 24 hours.
Step 11 Clean
After the adhesive has dried, thoroughly clean the paving.
- For indoor paving: Use a bucket and sponge to wash the surface.
- For outdoor paving: Hose off the surface with water to remove any dust buildup.
Grouting
Check out our video here showing how to grout
Step 12 Grout
Where to get grout?
Go to a landscape supplier and see if they have a fine white sand and ivory cement.
Grouting instructions
Prepare the mixture
- Mix 3 level shovels of white sand with 1 level shovel of ivory cement.
Create the base mix:
- Add 1 teaspoon of washing up detergent to 5 liters (1/4 of a bucket) of water.
- Agitate water and detergent mixture with a drill and mixing paddle to create bubbles. This will give the mix some body and prevent it from drying too quickly.
Combine ingredients:
- Gradually add the 3 shovels of white sand and 1 shovel of ivory cement to the bubbly water.
- Mix thoroughly using the drill and mixing paddle until the consistency resembles toothpaste.
You’re now ready to go!
Apply the grout:
- Put on rubber gloves and use a rubber grouting tool to push the grout into the joins.
- Work on roughly 1 square metre at a time, then wash off excess grout with clean water and a sponge.
Clean grout:
- Dampen your sponge and wring it out so it’s damp but not dripping wet.
- Gently wipe the surface, letting the sponge do the work without pressing down too hard.
Grouting Tip
Use a firm sponge as it runs over the top of the joins more effectively.
Final touches:
- You may need to go over the area a few times to clean it thoroughly.
- Consider giving it a final wash the next day.
Sealing
Step 13 Apply 2 coats of sealer
Once everything has been left to dry for a couple of days, it’s time to choose a suitable sealer, specifically for sandstone.
There are several options available on the market, so be sure to follow the instructions provided on the container.
Don’t forget to also check the recommendations for reapplication to ensure long-term protection for your crazy paving.
And there you have it. Following these steps you’ll create a beautiful and intricate area of flooring the enhances your garden’s aesthetic appeal and provides added value to your investment.

